Your hair extension success is only 50% about your stylist’s technical skill; the other 50% depends entirely on the biological state of your hair the moment you sit in the chair. With the hair extension market projected to reach $3.1 billion in 2026, more people than ever are investing in luxury hair, yet many overlook the critical prep work required for a lasting bond. If you’re wondering how to prepare for hair extensions appointment, you aren’t alone. Most clients worry about bonds slipping or sitting in a salon chair for five hours only to end up with a poor color match.
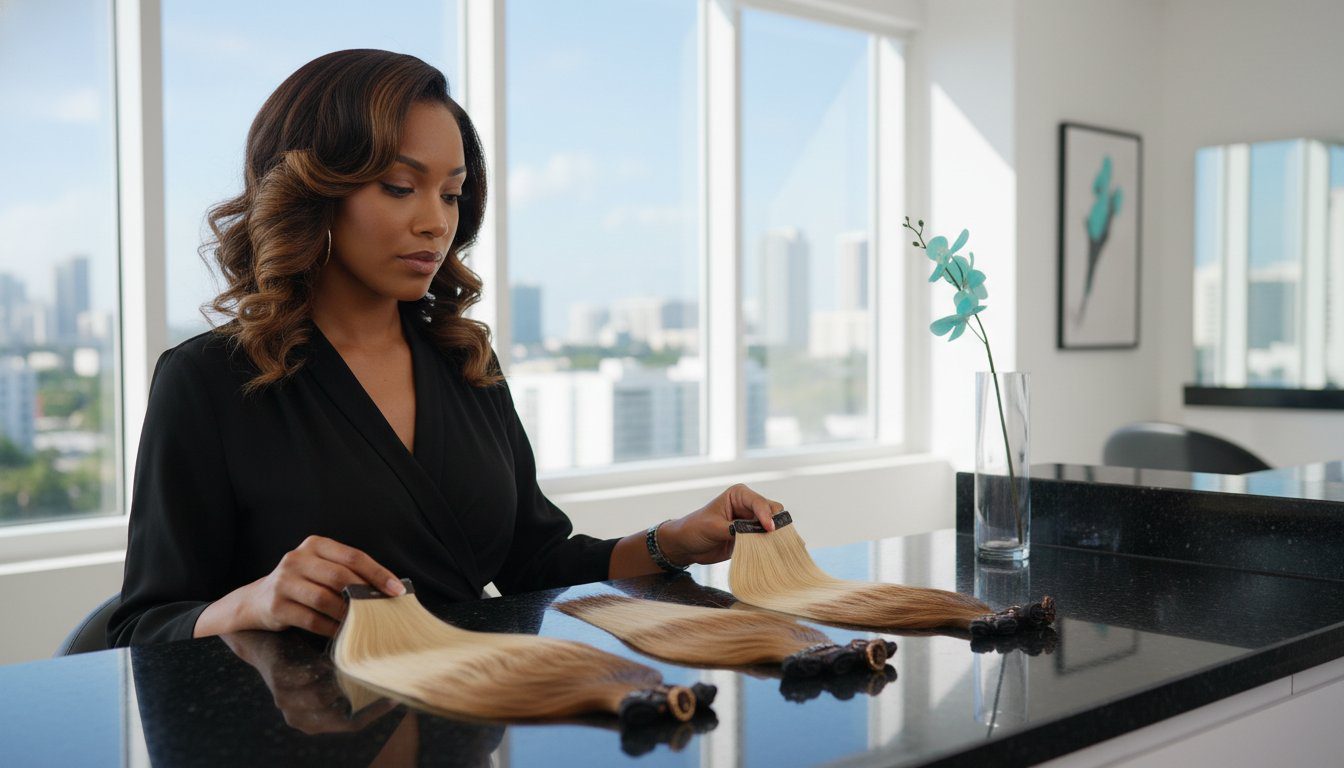
While virtual photos are helpful for a preliminary chat, an in-person consultation is non-negotiable for a professional result. Stylists in high-traffic areas like NYC and Miami need to see your hair in natural light to detect subtle undertones that a phone camera might miss. This level of personalized attention is a hallmark of luxury salons worldwide, including Christiaan Georgio Melbourne The Penthouse, where expert consultations ensure a perfect match. During this meeting, be honest about your lifestyle. If you gym daily, swim frequently, or travel often, certain methods might be better suited for your routine. This is also the time to discuss the difference between adding length and adding volume. If your natural hair is fine or thinning, your stylist might recommend a focus on density rather than extreme length to prevent unnecessary tension on your scalp. Setting these expectations early helps you plan a realistic budget for both the initial installation and the essential 6-week maintenance “move-up” appointments.
It’s natural to feel a bit of anxiety about the time and financial investment involved in transformations like K-Tip or Tape-In extensions. You want a result that feels like your own hair and stays secure through every wash. This guide will show you exactly how to prime your strands so your extensions stay secure, look seamless, and last as long as possible. We’ll cover everything from the specific products to avoid to the essential steps for ensuring your Balayage Artistry or Single Process Color blends perfectly with your new volume.
Key Takeaways
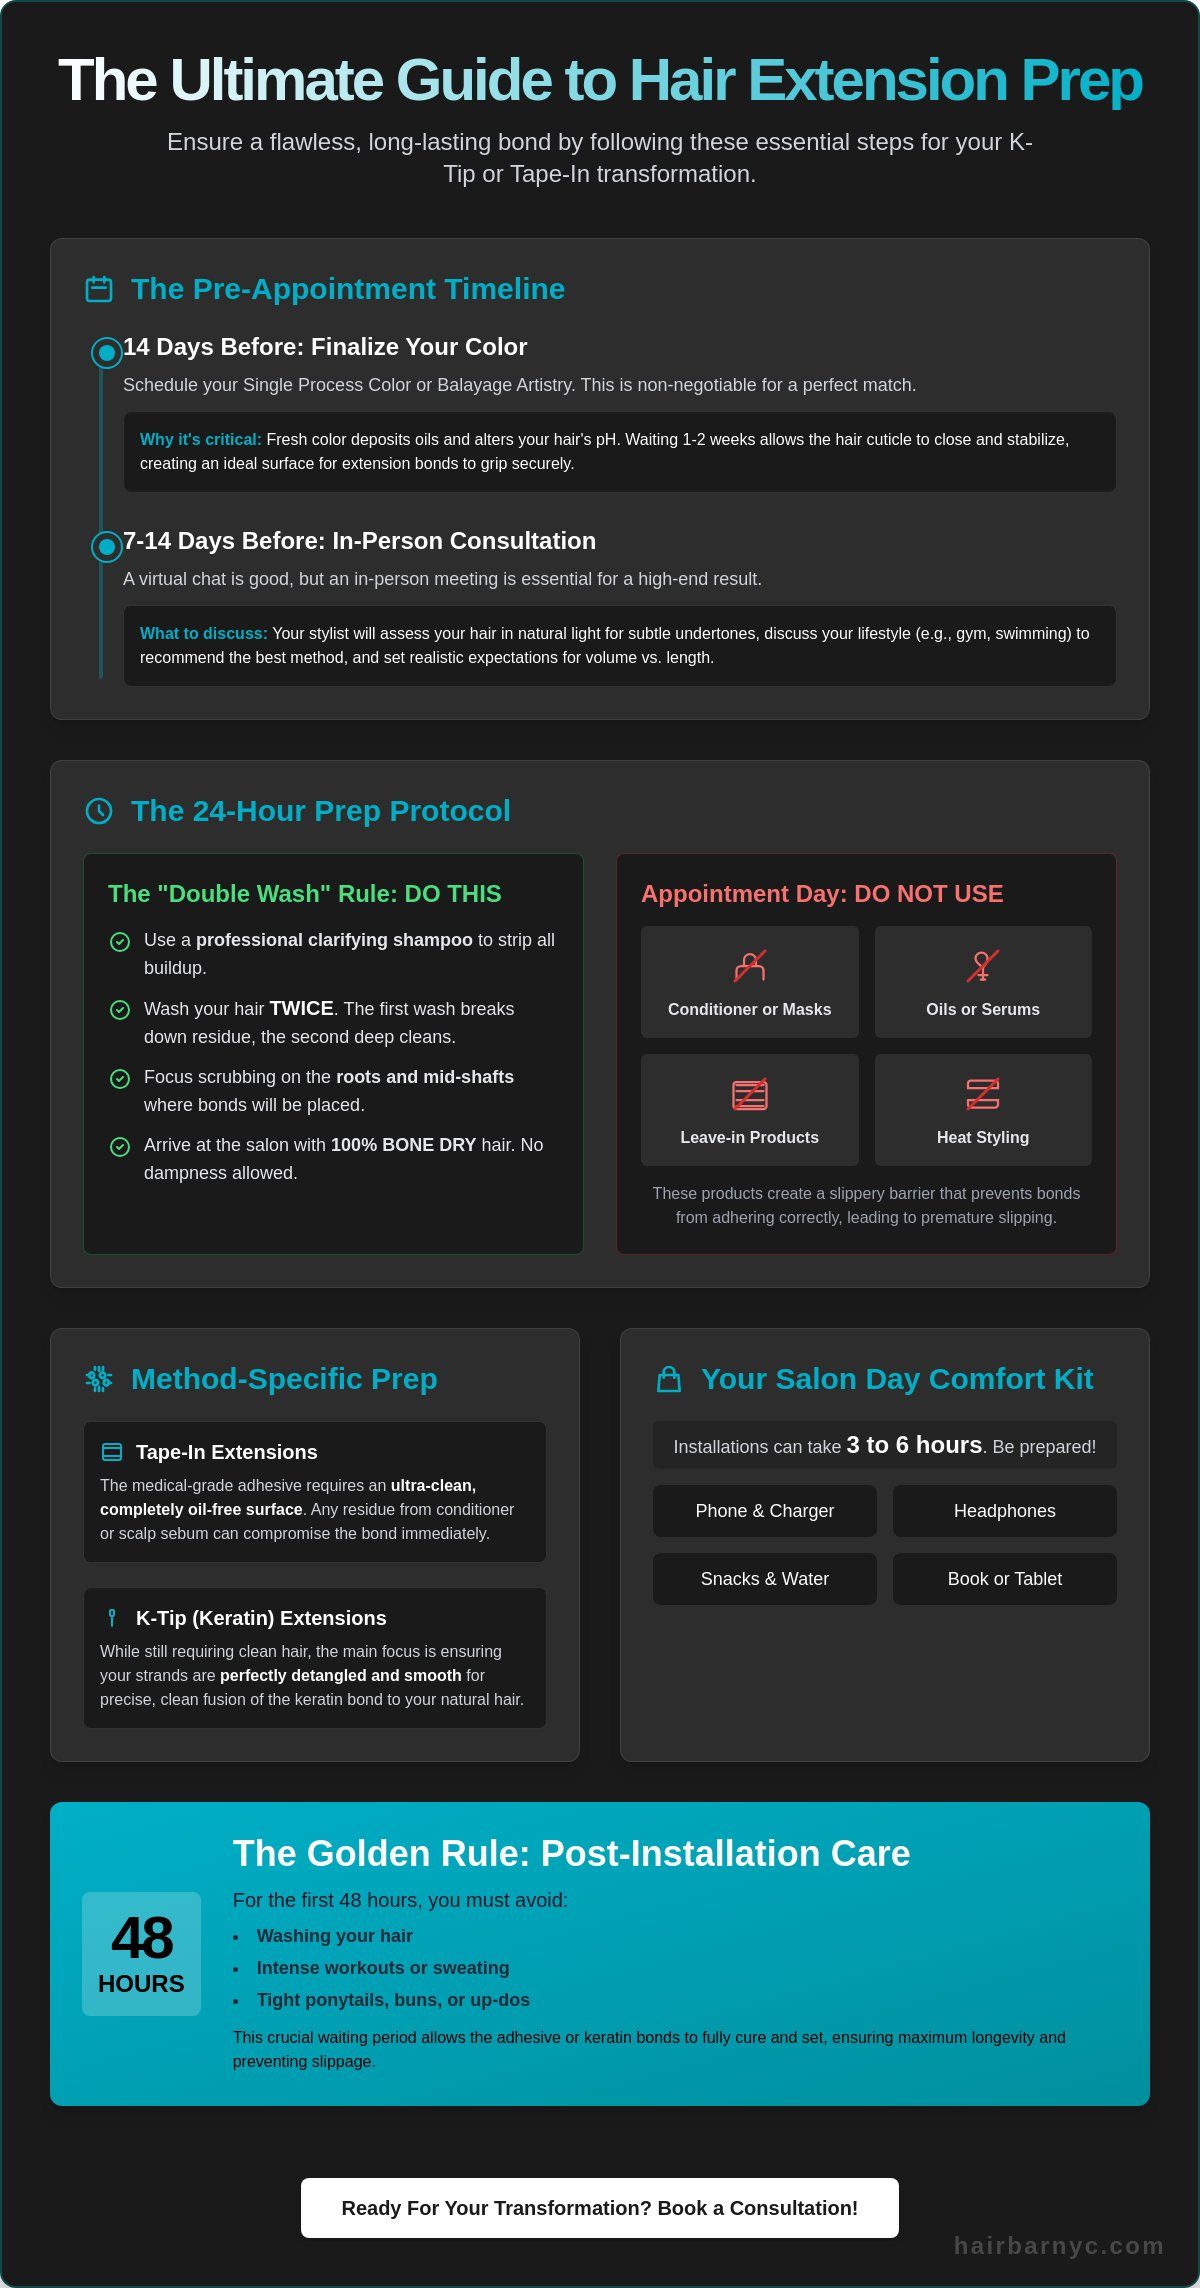
- Finalize your Single Process Color or Balayage Artistry 7 to 14 days before your visit to prevent fresh oils from interfering with the bonding process.
- Learn how to prepare for hair extensions appointment by following the “Double Wash” rule with a professional clarifying shampoo to eliminate residue.
- Understand the distinct prep requirements for Tape-In and K-Tip extensions to achieve maximum bond longevity and a seamless blend.
- Pack a salon survival kit for your 3 to 6-hour installation to stay comfortable and powered up during the transformation.
- Master the “Golden 48 Hours” rule post-installation to ensure your bonds set perfectly before your first wash or workout.
The Pre-Appointment Timeline: Coordination and Color Matching
A flawless hair transformation doesn’t begin when you sit in the salon chair; it starts at least two weeks before. Understanding how to prepare for hair extensions appointment requires a strategic look at your current hair health and color. The bond between your natural strands and the extension is incredibly sensitive to the chemical state of your hair. If you are planning to update your base shade or cover greys, you must coordinate these services with precision. Rushing the process often leads to premature slipping or a visible “ledge” where your natural hair ends and the extensions begin.
Your stylist needs a stable canvas to work with. Because there are many different types of hair extensions, including K-Tips and Tape-Ins, the preparation varies slightly, but the need for color consistency remains the same. Locking in your final look 7 to 14 days before installation ensures that the extension hair, which is often ordered specifically for you, matches your hair’s actual tone rather than a temporary shade.
The 14-Day Color Rule
You should never color your hair the same day you receive extensions. Chemical processing, such as a Single Process Color, works by opening the hair cuticle and altering its pH balance. It takes several days for the cuticle to lay flat again and for the residual oils from the coloring process to be fully rinsed away. If you apply Tape-In extensions to freshly colored hair, the medical-grade adhesive may not bond correctly to the oily surface. This leads to extensions “sliding” out within the first week. Give your hair at least seven days to settle so the extension bonds can grip the hair shaft with maximum strength.
The Virtual vs. In-Person Consultation
While virtual photos are helpful for a preliminary chat, an in-person consultation is non-negotiable for a professional result. Stylists in high-traffic areas like NYC and Miami need to see your hair in natural light to detect subtle undertones that a phone camera might miss. During this meeting, be honest about your lifestyle. If you gym daily, swim frequently, or travel often, certain methods might be better suited for your routine. This is also the time to discuss the difference between adding length and adding volume. If your natural hair is fine or thinning, your stylist might recommend a focus on density rather than extreme length to prevent unnecessary tension on your scalp; for those seeking specialized restoration, Thursday’s Calabasas offers expert non-surgical solutions. Setting these expectations early helps you plan a realistic budget for both the initial installation and the essential 6-week maintenance “move-up” appointments.
The 24-Hour Countdown: Essential Hair Prep Steps
The final 24 hours before your transformation are the most critical for ensuring your investment stays exactly where it belongs. While your stylist handles the technical installation, you are responsible for the foundation. The primary goal of your final prep is to create a “high-friction” environment. Extensions, whether they are K-Tips or Tape-Ins, require a clean hair shaft to achieve maximum adhesion. If you are wondering how to prepare for hair extensions appointment, the answer starts with stripping away every trace of residue, oil, and silicone that has accumulated on your strands.
Arriving at the salon with 100% dry hair is another non-negotiable step. Professional installations can take anywhere from 3 to 6 hours. If your stylist has to spend the first 45 minutes performing a Signature Blowout just to get your hair ready for the bonds, it eats into your service time and can delay the entire day. More importantly, applying extensions to even slightly damp hair can trap moisture within the bond or tape. This can lead to premature slipping or, in rare cases, bacterial growth between the extension and your natural hair.
The Clarifying Protocol
To get your hair ready, follow the “Double Wash” rule. Use a professional-grade clarifying shampoo and wash your hair twice. The first wash breaks down surface-level pollutants and styling resins. The second wash deep cleans the cuticle, ensuring the natural sebum from your scalp is completely removed. When selecting a shampoo, look at the ingredient list. Many “moisturizing” shampoos contain heavy silicones like dimethicone, cyclomethicone, or amodimethicone. These ingredients are designed to make hair slippery and shiny, which is the opposite of what you want. You need “naked” hair that feels slightly squeaky to the touch. Focus your scrubbing on the roots and mid-shafts where the extensions will be attached.
What to Avoid on Appointment Day
On the morning of your visit, your hair should be completely free of all products. There is a zero-tolerance policy for leave-in conditioners, hair oils, or shine sprays. Even a small amount of oil can compromise the integrity of a keratin bond. You should also skip the dry shampoo. While it might seem helpful for managing oil, the starch and powder particles in dry shampoo create a barrier that prevents the adhesive from making full contact with the hair shaft. If you are concerned about maintaining your hair’s health during this process, you can stock up on Keratin Care Shampoo for your post-appointment routine, but for the day of the install, stick to a basic, oil-free clarifying wash.
Preparing for Specific Methods: Tape-Ins vs. K-Tip Extensions
While the initial clarifying wash is a universal requirement, the physical state of your hair should vary slightly depending on the installation method you’ve chosen. Understanding how to prepare for hair extensions appointment means recognizing that different adhesives interact with the hair cuticle in unique ways. For instance, a method that relies on medical-grade tape requires a different surface tension than one using a thermal keratin bond. Your goal is to provide the most compatible surface for the specific technology your stylist will use.
Climate plays a massive role in how these bonds “cure” during the first few hours. In high-humidity markets like Miami or during a humid NYC summer, moisture in the air can actually interfere with the initial setting of the bonds. If your hair isn’t bone dry and the cuticle isn’t prepared correctly, the humidity can cause the bonds to swell or the tape to lose its tackiness before it fully adheres. Arriving with the right hair texture for your specific method helps mitigate these environmental risks.
The Tape-In Checklist
Tape-In extensions rely on a “sandwich” method where two adhesive strips bond together with a thin slice of your natural hair in between. For this to work, your hair must be completely flat and smooth. Any wave or frizz in the root area can create tiny air pockets within the tape sandwich, which eventually leads to the extension slipping out. When you use Tape-In Hair Extensions, the adhesive needs a “clean slate” for the first 48 hours to ensure a permanent hold. If you’re a returning client, ensure you’ve thoroughly clarified to remove any oily residue from the previous removal and re-tabbing process.
The K-Tip (Keratin) Advantage
Keratin bonds are often considered the gold standard for clients with high-activity NYC or Miami lifestyles because they move more naturally and resist sweat better than tapes. The science behind K-Tip Extensions involves a polymer that mimics the natural protein structure of your hair. Unlike tapes, K-Tips actually benefit from a hair cuticle that is slightly “roughened” by a clarifying wash rather than one that is smoothed down by conditioners. This texture gives the keratin bond more surface area to grip, which is essential for achieving that 3 to 5-month longevity. If your hair is too slippery, the bond won’t be able to fuse effectively with your natural strands.
Salon Day Strategy: Managing Time and Comfort
Sitting in a salon chair for a full installation is a marathon, not a sprint. Depending on your hair density and the method chosen, you should expect to spend anywhere from 3 to 6 hours with your stylist. Knowing how to prepare for hair extensions appointment involves more than just washing your hair; it requires a strategy for physical comfort and mental focus. Because NYC and Miami professionals often have demanding schedules, the modern salon experience has evolved to accommodate productivity. If you plan to stay busy during the process, ensure your survival kit includes a laptop charger with a long cord and noise-canceling headphones.
Your choice of clothing is more important than you might think. Avoid hoodies or high-collared shirts. These garments create bulk at the nape of the neck, which is exactly where your stylist needs the most precision for placement. A simple button-down shirt or a wide-neck t-shirt allows the hair to fall naturally against your back, ensuring the bonds are placed accurately. Arriving with a full stomach is also wise. Low blood sugar during a long service can lead to fatigue or lightheadedness, so eat a protein-rich meal before you arrive.
Maximizing Your Time in the Chair
The “laptop-friendly” salon environment is now a standard for high-end transformations. You can easily clear your inbox or attend virtual meetings while your K-Tips are being fused. To stay comfortable, bring small, protein-dense snacks that are easy to eat with one hand. Avoid messy foods that require a lot of movement, as keeping your head still is vital for the stylist’s precision. Many clients choose to schedule a Signature Blowout as the final step of the installation. This ensures the new hair is perfectly styled and integrated with your natural texture before you walk out the door.
The Placement Consultation
Communication doesn’t end once the installation begins. You must be vocal about your styling habits. If you frequently wear high ponytails or top knots, tell your stylist so they can adjust the “high ponytail zone.” This involves placing the bonds further away from the hairline to ensure they remain hidden when the hair is pulled up. Before the service is finalized, perform the “tension test.” The extensions should feel secure but never painful. The most critical 20 minutes of the day is the final cut. Your stylist will use a Precision Haircut technique to blend the extensions with your natural hair, removing the blunt lines that often make extensions look obvious.
Ready to transform your look with expert precision? Book your extension installation today to secure your spot with our specialist team.
Post-Appointment Readiness: Your Maintenance Kit
The work doesn’t end when you walk out of the salon with your new, voluminous hair. In fact, the most critical phase of your extension journey begins the moment you leave the chair. Part of knowing how to prepare for hair extensions appointment is having your home care arsenal ready before you even arrive for your installation. The longevity of your bonds depends heavily on your lifestyle choices during the first few days and your commitment to a nightly maintenance ritual. If you don’t have the right tools waiting at home, you risk damaging the bonds before they’ve even had a chance to settle.
Adhering to the “Golden 48 Hours” is the most important rule for any new installation. Whether you chose K-Tips or Tape-Ins, the bonds and adhesives need a full two days to cure and set completely. During this window, you must avoid washing your hair or engaging in activities that cause excessive sweating. Moisture and steam can soften the bonds before they have hardened, leading to premature slipping. Once this initial period passes, you should schedule a quick check-up appointment for two weeks post-install to ensure your scalp is adjusting well to the new weight and that no bonds have shifted.
The Essential Extension Care Kit
You cannot use standard drugstore products on professional extensions. Many common shampoos contain sulfates and alcohols that dissolve keratin bonds and weaken tape adhesives. You should switch to Keratin Care Shampoo immediately to maintain the integrity of the hair and the bonds. While hydration is important, you must only apply a Deep Conditioning Mask or conditioner from the mid-shaft to the ends. Never let heavy creams touch the attachment points at the scalp. Additionally, a loop brush is the only tool that should touch your scalp; its unique design allows you to brush over the bonds without snagging or pulling them loose.
Lifestyle Adjustments in NYC & Miami
Living in high-energy environments like NYC or Miami presents unique challenges for extension wearers. The Florida sun and salt water can be particularly harsh on human hair extensions, which don’t receive natural oils from your scalp. Before swimming, always wet your hair with fresh water and apply a leave-in protectant to prevent salt absorption. When it’s time to wash, learn to work in sections. This prevents the hair from matting at the root and ensures you’ve thoroughly rinsed the scalp. To make your long-term care easier, consider using an E-Gift Card to prepay for your 6-week maintenance blowouts. This ensures your “move-up” appointments are already accounted for in your beauty budget. Every night, secure your hair in a loose, low braid to prevent friction and tangling while you sleep on a silk pillowcase.
Step Into Your Most Confident Transformation
A successful hair transformation is a partnership between your preparation and your stylist’s expertise. By locking in your color two weeks early and arriving with perfectly clarified, dry hair, you’ve set the stage for bonds that stay secure and look natural. Now that you know exactly how to prepare for hair extensions appointment, you can approach your visit with total confidence. Whether you choose the seamless blend of K-Tip Extensions or the versatile volume of Tape-In Hair Extensions, your commitment to these pre-appointment steps ensures your investment lasts for months.
Our specialists at Hair Bar NYC are experts in both K-Tip and Tape-In methods. We use formaldehyde-free Silk Touch Keratin products to prioritize the integrity of your natural hair. With convenient locations across NYC and Miami, we make it easy to maintain your luxury look. Don’t leave your results to chance. Book Your Extension Consultation at Hair Bar NYC today to start your journey toward a flawless, high-volume style. You’re just one appointment away from the hair of your dreams.
Frequently Asked Questions
Should I wash my hair the morning of my extensions appointment?
You should wash your hair the morning of your visit using a professional-grade clarifying shampoo. This step is a vital part of how to prepare for hair extensions appointment because it removes natural oils and product buildup that cause slippage. Avoid all conditioners and styling products. Arriving with 100% dry, naked hair ensures the adhesive or keratin bonds can grip the hair shaft securely from the start.
Can I dye my hair the same day I get extensions installed?
You shouldn’t color your hair on the same day as your installation. Chemical services like Single Process Color or Balayage Artistry open the hair cuticle and often leave behind residual oils. These substances can cause Tape-In or K-Tip extensions to slide out prematurely. It’s best to finalize your color at least 7 to 14 days prior to allow the cuticle to settle and ensure a perfect shade match.
How long does a full hair extension appointment usually take?
A full hair extension installation typically takes between 3 and 6 hours. The exact duration depends on your natural hair density and the specific method being applied. This timeframe includes the strategic placement of the bonds and the final blending cut. Since it’s a significant time investment, many clients bring a laptop or snacks to stay productive and comfortable throughout the transformation.
Do I need to bring my own hair to the salon?
You generally don’t need to bring your own hair if you’ve already completed a professional consultation. During that initial visit, your stylist matches your texture and color to order the specific K-Tip or Tape-In extensions required. This ensures the hair quality and origin meet professional standards. If you’re considering a change, check with your stylist during the planning phase to see how they source their premium hair.
What should I wear to my hair extension appointment?
You should wear a button-down shirt or a top with a wide neckline for your visit. Avoid hoodies, turtlenecks, or garments with bulky collars that sit high on the neck. These items can obstruct the nape area, making it difficult for the stylist to achieve precise placement. Comfortable clothing is also recommended since you’ll be seated for several hours while your new length is meticulously installed.
Can I use my regular shampoo once the extensions are in?
You shouldn’t use standard drugstore shampoos that contain sulfates or heavy silicones. These ingredients can dissolve the adhesives in Tape-Ins or weaken the polymer structure of K-Tip bonds. Instead, switch to a specialized Keratin Care Shampoo. This professional formula is designed to cleanse your scalp gently while preserving the integrity of the extension attachments and your natural hair’s health over the long term.
Should I cut my hair before getting extensions?
You don’t need to cut your hair immediately before your appointment. In fact, having your natural length helps the stylist determine the best placement for blending. Your stylist will perform a Precision Haircut at the end of the installation to integrate the extensions seamlessly with your natural strands. If your ends are extremely damaged, your stylist might suggest a light trim during the consultation phase.
What happens if my hair is too short for extensions?
If your hair is shorter than four to five inches, it may be difficult to hide the attachment points. During your consultation, a stylist will assess if there’s enough length to cover the bonds of K-Tips or the panels of Tape-Ins. While extensions are excellent for adding volume to shorter styles, having a baseline length ensures the most natural-looking result and prevents the bonds from being visible.
Related posts

Silk Touch Keratin Reviews: Is This Formaldehyde-Free Treatment Worth It in 2026?
Imagine stepping out into the heavy humidity of a New York summer or a Miami afternoon only to watch your smooth blowout vanish in seconds. It's a...

Keratin Treatment for Damaged Bleached Hair: The 2026 Repair Guide
Have you reached the point where your hair feels more like wet cotton candy than actual strands? It's heartbreaking to see your dream blonde turn...
Best Hair Extensions for Fine Hair in NYC: The 2026 Expert Guide to Volume and Safety
What if the very solution you're seeking for thin hair is actually the one thing causing it to break? You likely already know the frustration of...